History of Photography
|
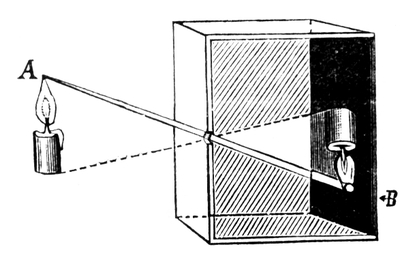
Camera obsucra – the first real appearance of photography ever. It consisted of the idea that if you poke a hole in a dark room. Light passing through a small hole is projected upside-down with the colour and perspective of the image outside of the box being the one projected. The first people to discover this and people associated with the this are Mozi and Aristotle.
After this ancient philosophers and artists such as Leonardo Davinci used camera obscura devices to trace out and make sketches of the outside world during the 1490s. An example of how this was done on the right. The artist would sketch the projected image onto a piece of paper. During the 1700s camera obscura devices slowly became more and more people had these devices and used them to create sketches. However in 1723 a man named Johan Heinrich Schulze discovered that when silver nitrate is mixed with certain things it reacts with light. However faded away shortly after. Following this in 1826 a man named Joseph Nicéphore Niépce discovered a technique called heliography in which the first photograph was ever made. Shortly after the discovery of heliography a man by the name of Louis Daguer created the first ever commercially available camera called the daguerreotype by selling it to the french government in 1833. Making it available to the public. |
|
Photograms:
First Attempt:

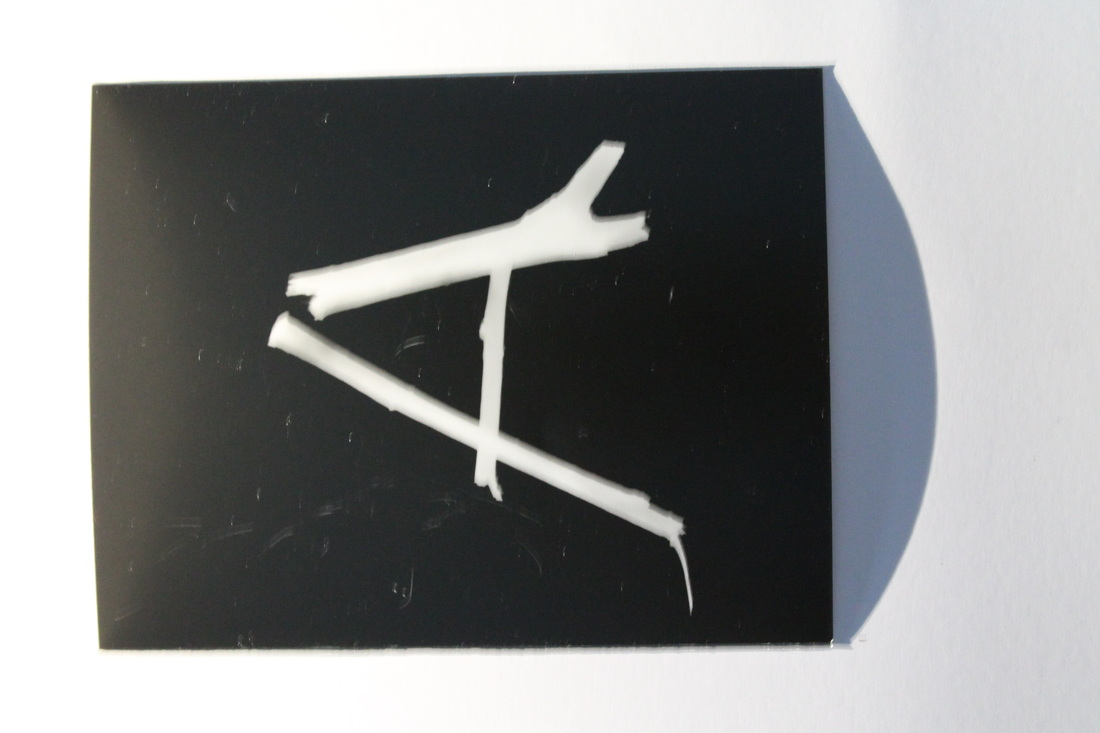
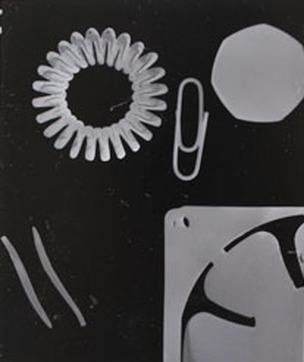
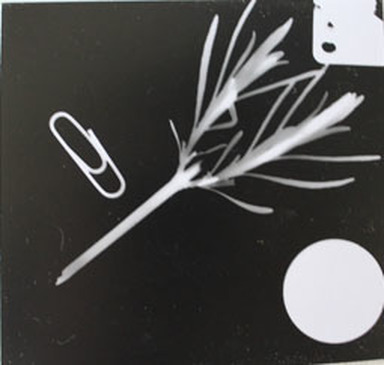
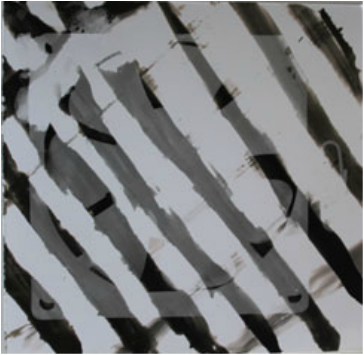
-Here are the first photograms i attempted to make. I made these using the most common technique and it is just to simply expose the photographic paper and develop it. This is done through a multiple step proccess.
The photographic paper is placed under the enlarger and objects are placed underneath the light and on top of the paper and exposing the paper to white light for a short period of time. The photographic paper is then submerged into a bath of silver nitrate solution, also called the developer. Then it is placed in the stop for a period of time. Then the fix. And finally into a bath of water. After this the paper is put through a dryer to remove all water and the photo is ready to view from that point on.
The photographic paper is placed under the enlarger and objects are placed underneath the light and on top of the paper and exposing the paper to white light for a short period of time. The photographic paper is then submerged into a bath of silver nitrate solution, also called the developer. Then it is placed in the stop for a period of time. Then the fix. And finally into a bath of water. After this the paper is put through a dryer to remove all water and the photo is ready to view from that point on.
Experimental Techniques:
|
|
|
Painting on with developer:
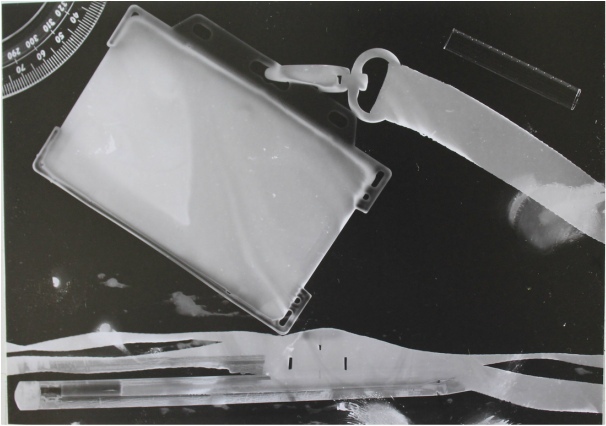
The photograms shown above were taken and processed using a few different techniques. The first of them being painting on the developer solution instead of submerging it. This is done by simply getting a paint brush and applying the solution to the photographic paper before any other development has taken place. See the 3rd photo on the right as a reference. After painting on the developer solution you continue with the regular way of processing the photo by putting it in the stop then the fix etc.(for more information on that process see the earlier explanation) |
|
|
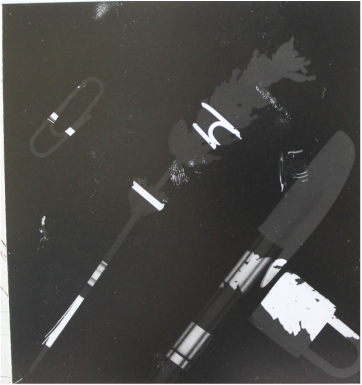
Double Exposure: The photogram on the left is an example of double exposure. This is through a series of steps similar to regular photograms. However when taking double exposure photos there is a simple and relatively self explanatory step. After the photo has been exposed. Move the objects and re-expose the photographic paper without developing the photo. Now after this has been done develop the photo as it were a normal photogram and the result is something similar to the photo shown on the left above. |
Final Product:
Solarisation:
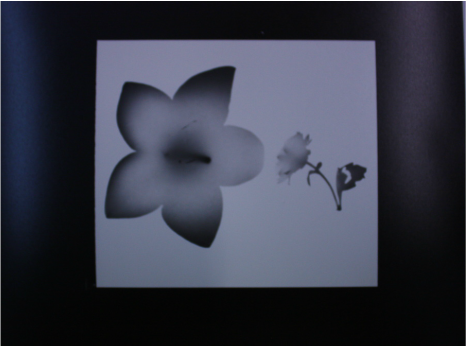
-For my final peice i used a technique called solarisation, to do this it is simply the same as doing a regular photogram however after the photo has been developed you place the paper under the enlarger for the second time and expose it for 3-4 seconds and placing it in the fix. This creates a darkened x-ray(ish) affect. It dint turn out how a perfect solarised photo would have however this was my best attempt and i couldn't produce anything better than this.
-For my final peice i used a technique called solarisation, to do this it is simply the same as doing a regular photogram however after the photo has been developed you place the paper under the enlarger for the second time and expose it for 3-4 seconds and placing it in the fix. This creates a darkened x-ray(ish) affect. It dint turn out how a perfect solarised photo would have however this was my best attempt and i couldn't produce anything better than this.
Sandwich Prints:
This sandwich print was created using a regular photogram i created in the first lesson. To do this what has to be done is the photogram has to be placed on top of a larger piece of photographic paper. Placed underneath the enlarger, and a large piece of glass is placed on top of the two as to not have any gaps in between the photos when it is developed. Once the glass has been aligned and made sure that the photos are straight and in line it is then exposed in light for 4 seconds roughly. Once that has happened then proceed to place the photo into the fix and stop and finally the water bath for the respective times.
|
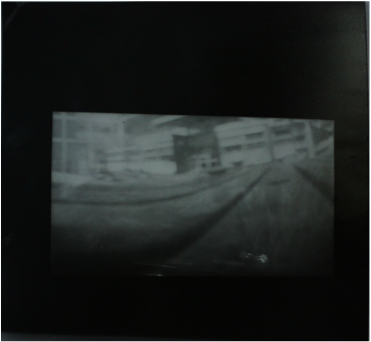
This sandwich print contained the photo that was created using the pinhole camera. Most of the photos i took turned out too exposed or not exposed enough. However this is one of the few that turned out usable. I took this negative and made this print using the technique described in the article to the left.
|
Pinhole Camera Photos.
|
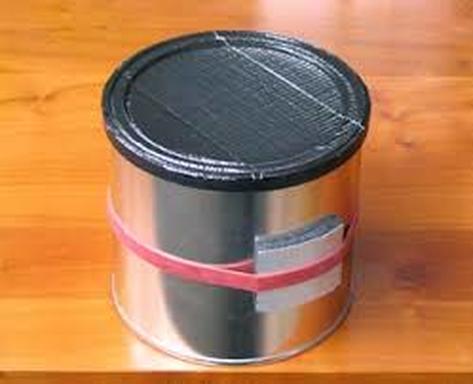
When taking a pinhole camera photo you have to first off make a pinhole camera. To do this the way people usually do for a low price, pinhole cameras can be made out of a tin with a lid. Often a pringles can. When this is done you will be left with a pinhole camera ready to be filled with unexposed photographic paper. To keep it this way you must put the paper in, in a dark room. When you have your loaded pinhole camera you must experiment with exposure times to determine what the right exposure time is for the type of lighting the photo is being taken in. This is done by simply counting and removing the cover for that time. Alternatively you can search it up and try and find somewhere where it tells you the exposure times for the lighting however these may not apply to your pinhole camera as the hole may be bigger or smaller in the camera.
|
|
Ten themed photos homework task.
The series of photos i have take for this task focus around 2 main themes. Using buildings and architecture for effect when photographing other buildings and landmarks. And focusing on small figures and architecture.
35mm Camera
|
A task we were given was to go out and take a handful of photos using a 35mm camera. To do this there are a few extra steps in between taking the photos and picking up the camera. Firstly you mus take the film out o the roll and open up the back of the camera. After you do this you place the roll into the back of the camera and feed the film into the section that moves the film after a photo is taken. After this you must use a light meter to determine the aperture of the camera. This determines how big the hole that lets light in is. Next you must assess what type of photo you are taking and adjust the shutter speed. However usually for a normal photo you will leave the shutter speed at 125. After this you can take a photo after you pull back the lever to pull the film through and make sure the entire photo looks focused. After the photos are taken the film is developed and dried out. Then using the technique stated in the "Projecting film onto photographic paper" section.
|
Appature and Shutter Speed:
|
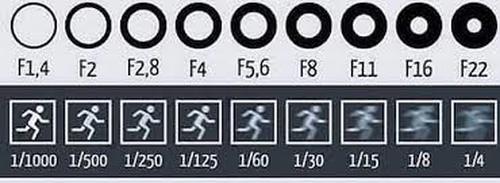
Aperture is the way photographers manipulate how much light is allowed through the shutters and onto the film in the case of film cameras. Practical applications of adjusting the aperture include decreasing or increasing the focal length. This makes the effect that the item in focus the only thing that inst blurred. or if it is adjusted in he opposite way then more and more things in the frame will become focused. Aperture in the same way is used to create a clearer image if it is a bright day, or vica versa if it is a dark day. Eg decrease aperture if it is a very dark setting. Shutter speed is the time the camera opens the shutter blinds onto the film. The longer the shutter speed the more the exposure increases and the blurrier the image. The faster shutter speed would decrease exposure and would be used to catch explosive and fast actions without the picture coming out blurry.
|
|
Projecting film onto photographic paper:

2S^ 4S^ 6S^ 8S^ 10S^ 12S^ 14S^ 16S^ 18S^
When projecting film onto a piece of photographic paper we were tasked to experiment with levels of light exposure. To do this we first had to place the film into a the enlarger. This was done by putting it into a film holder that is slotted into the enlarger. After this we had to get the enlarger in focus. We used a magnifier of sorts to see if the grains of the photo are in focus. If not we adjusted the focus until we were happy. Next we got a piece of black paper and covered sections of the paper while we exposed it in 2 second intervals shown above going from right to left. Right being the shortest time. Producing the darkest section. These were called test strips. When we decided which level of exposure worked best for us we created another test strip this time on one level of exposure.
In the photo above i experimented with about 10 seconds of exposure. All of the photograms here were made using the most common technique of developing film into a photo. This gave a picture that turned out ever so slightly too dark. For my next attempt i tried a slightly lesser exposure time and recorded the outcome.
|
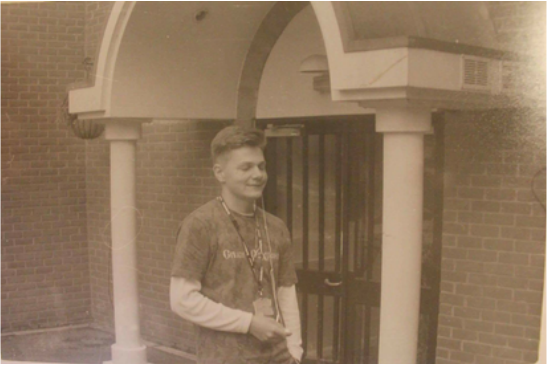
This is one of the selected photographs i enlarged and developed. The photo here was taken using a light meter app to adjust the aperture. This was used because the light meter on the camera we were using was broken. This is why an app which told us the correct aperture to use was required. In the photo itself here i used the pillars behind him to frame the photo. The development of the photo itself was not left in for long enough in the developer. That is why there is a slightly warm tinge to the black and white photo.
|
